This is default featured slide 1 title

Go to Blogger edit html and find these sentences.Now replace these sentences with your own descriptions.This theme is Bloggerized by Lasantha Bandara - Premiumbloggertemplates.com.

This is default featured slide 2 title

Go to Blogger edit html and find these sentences.Now replace these sentences with your own descriptions.This theme is Bloggerized by Lasantha Bandara - Premiumbloggertemplates.com.

This is default featured slide 3 title

Go to Blogger edit html and find these sentences.Now replace these sentences with your own descriptions.This theme is Bloggerized by Lasantha Bandara - Premiumbloggertemplates.com.

This is default featured slide 4 title

Go to Blogger edit html and find these sentences.Now replace these sentences with your own descriptions.This theme is Bloggerized by Lasantha Bandara - Premiumbloggertemplates.com.

This is default featured slide 5 title

Go to Blogger edit html and find these sentences.Now replace these sentences with your own descriptions.This theme is Bloggerized by Lasantha Bandara - Premiumbloggertemplates.com.

Wednesday 5 December 2012


Easily Create A Custom Ubuntu Live CD With Ubuntu Customization Kit (UCK)

When Ubuntu 10.04 Lucid Lynx comes out, I will probably upgrade instead of doing a fresh install. But I will also create an .ISO file for various usages and my Ubuntu Live CD will have GIMP installed by default (among other changes I will make to my custom ISO)! I'm not going to comment on the decision to exclude GIMP from the default Lucid installation, but I don't want to accept it so I will make a custom Ubuntu Lucid Lynx Live CD.

Ubuntu doesn't support customization before downloading the ISO, but you cancustomize your Ubuntu Live CD by using UCK - Ubuntu Customization Kit.

Ubuntu Customization Kit is a GUI tool that helps you customizing official Ubuntu Live CDs (including Kubuntu/Xubuntu and Edubuntu) to your needs. You can add any package to the live system, for example language packs, or applications.

Ubuntu Customization Kit


USING UBUNTU CUSTOMIZATION KIT (UCK)


To use UCK, you will need (download link at the end of the post):

1. about 5 GB of free disk space in ~/tmp
2. Internet access for fetching language packs
3. apt-source line "deb-src http://archive.ubuntu.com/ubuntu/ karmic main" enabled (necessary for bootlogo building) - "karmic" should be changed if you use a different Ubuntu version.


If you want to build an ISO for an Ubuntu version other than the once you are currently using, you must open your /etc/apt/sources.list and search and replace (temporarily) any occurrence of your current Ubuntu version with the Ubuntu version you want to build the ISO for. Doing this is pretty easy: press ALT + F2, enter:
gksu gedit /etc/apt/sources.list

If for instance you are using Ubuntu Karmic and want to create an Lucid ISO (obviously, you will also need the Lucid ISO), replace "karmic" with "lucid" and save the file. Don't forget to revert the changes after you finish building your custom ISO (repeat the steps above, and replace "lucid" with "karmic" - in my example).

Note: If customizing a CD for another architecture than the installation used for customization the executables from the LiveCD may not run.

If you don't want to build a custom language ISO, you can simply click OK on the first 2 configuration screens, select your default Ubuntu .iso downloaded from the website, then just choose yes when asked if you want to customize the ISO. After this, the fun part begins: you can choose to open the UCK Package Manager which is basically Synaptic, but for UCK and then you can install new packages and remove others:

UCK package manager

You can also chose to select which packages to add / remove, via a terminal.

Once you are done with the customizations, select "Continue building":

uck

Now all you have to do is wait for UCK to finish your custom Ubuntu ISO. On a slow computer, it cant take quite a while. Once the ISO file is ready, it will be saved under ~/tmp/remaster-new-files/livecd.iso.

Linux vs Windows


Why Linux is Better Than Windows

OUR LINUX TOP 10 REASONS


  1. Security - Linux is Open Source Software, while Windows is not. The simplest benefits of Open Source Code to demonstrate are increased security, reliability and functionality; because users of Open Source are readily able to identify and correct problems with the programs and to submit their own enhancements for incorporation into the program. Closed Source systems enjoy none of those benefits.
  2. Scalability - Systems implemented under Linux can be cloned limitless times without paying additional software licensing fees - With Windows, you pay for each installation/workstation/server/cpu.
  3. Power - Linux is made with the Unix design philosophy, which dictates that system tools are small and highly specialized. The result is an incredibly powerful and reliable system, limited in capability only by the user's imagination and ability to integrate the Unix utilities. The Windows philosophy is to create unwieldy swiss army knives, limited in capability by how many features the user purchased on their particular knife. Diminished reliability is arguably a side effect of increased complexity. Thus with Windows, the case is often that you have tools that ALMOST do what you want them to, if they didn't crash.
  4. Reliability - The architecture of Linux is superior to Windows because critical operation system functions are implemented in such a way that buggy programs can't cause the computer to become unstable and crash. In fairness, though not quite as robust as Linux, Windows 2000 and Windows XP are much improved over Windows 9x and Windows Millenium Edition.
  5. Advanced Capabilities - In addition to the system utility tools from the Unix world, Linux usually comes with the Apache Webserver, an email server, router/firewall capabilities and SQL databases. These are extras costing up to thousands of dollars on Windows. There IS free software to do these jobs on Windows, but it has mostly been adapted from Linux and loses some functionality when ported to Windows.
  6. Compatibility - Linux is POSIX Compliant which means that applications developed for Linux can be operated on other POSIX compliant Unix derivatives with a minimum of reworking.
  7. Support - For persons not familiar with the Open Source Community, the quality of free technical support on the internet may come as a shock. Sometimes knowing enough to ask the right questions can be a problem, but overall the best and the brightest are there to assist you at no charge when you run into problems that can't be solved by reading the documentation included with Linux. With Windows or other commercial software, your manufacturer support is only free for a limited time and is often of little value anyways.
  8. Not Single Source Software - Linux is distributed by several companies, giving consumers to pick and choose the flavor that best suits their needs. Windows is the product of a single company, Microsoft Corporation. Windows users have no choice but to accept what Microsoft offers.
  9. Rate of Advancement - Linux has and will continue to advance at a rate impossible for a close development project such as Microsoft Windows to sustain. A few factors driving this rate of progress are (in no particular order): the number of active developers; quantity and quality of feedback from the field; short development cycle from development team to the end user; absence of corporate "meddling" in the design process; independently developed open source subsystems frequently incorporated into Linux, giving it quantum advances in a short time.
  10. Cost - That Linux is FREE deserves honorable mention and a bit of explanation. You can package and sell Linux for money. The competing Linux distributions all provide slightly different feature sets beyond the core system, including canned e-commerce solutions, printed manuals and phone support options. There is no rule that says you can't make money distributing Linux. For those who choose to download and install free distributions from the Internet, Linux is truely free. Some cynics have proclaimed, "Sure Linux is free now, but the Linux People will start charging for it once it catches on!". That statment is completely false. No single person or organization controls Linux, so that will never happen. In the unlikely case that Linus Torvalds (the author of Linux) adds some proprietary code and proclaims that all future releases will be $99.99USD, someone will simply take the latest "free" version and possibly rename it to Spin-UX. Then all the volunteer developers and contributors will jump on that bandwagon. Spin-UX will diverge from its Linux roots, over time becoming better supported and more advanced, rendering its ancestor obsolete, except possibly for purposes specifically addressed by that hypothetical proprietary added code. Furthermore Linux is covered by the Gnu Public License, stating that it and all derivative works must be distributed with the source code. This makes it extremely unlikely that anyone will wield monopolistic power in the Linux Sector.
To conclude this hopefully persuasive bit of Linux Advocacy, it must be stated that an Operating System without suitable Applications is of little use. There are free web browsers and email clients for Linux, as well as the free Star Office product from Sun Microsystems. Star Office includes the traditional productivity applications: Word Processing, Spreadsheet and Database. Corel Office is also available for Linux at little or no charge.
As more small businesses adopt Linux, the number of Indepdendent Software Vendors offering industry specific (Vertical Market) applications will increase. As I learn of business applications designed for Linux, I will document them on this site.

Friday 30 November 2012


Mounting Linux Partitions in Ubuntu

If you plug in an external hard drive with a Linux filesystem, it will automount and show up on your desktop, just like any external media. But what if you have an internal hard drive or partition with a Linux filesystem? Well, that's what this tutorial is about.Warning: The tutorial on this page is for an internal drive that will serve as an extra data partition. If you would like to mount a separate drive or partition as /home instead, you want a different tutorial.
First you have to determine what the partition is called and what filesystem it is. One quick way to do it if you know what filesystem you formatted the drive as (Ext3, for example) is to just type the terminal command
sudo fdisk -l

Here's how it could come out:
Disk /dev/sda: 8589 MB, 8589934592 bytes
255 heads, 63 sectors/track, 1044 cylinders
Units = cylinders of 16065 * 512 = 8225280 bytes
Sector size (logical/physical): 512 bytes / 512 bytes
I/O size (minimum/optimal): 512 bytes / 512 bytes
Disk identifier: 0x000eb4baDevice Boot Start End Blocks Id System
/dev/sda1 * 1 524 4208006 83 Linux
/dev/sda2 525 1044 4176900 83 Linux
As you can see, I'm able to locate that /dev/sda2 is my Linux partition, but inSystem, I don't find out if it's Ext3, Ext4, Reiserfs, or what it is. If I happen to know it's Ext4, cool.
But let's say I didn't know. Well, one way to find out for sure is to install GParted and find out:

sudo apt-get update
sudo apt-get install gparted gksu
gksudo gparted
 
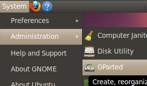
You can go to System > Administration > GParted and enter your password to get it started.

Ah, now I can definitely see it's Ext4 for sure. Under Partition I see it's /dev/sda2, and under Filesystem, I see it's Ext4.
If you have a second physical hard drive (not just another partition), you might have to click on the top-right corner to focus on the second hard drive. (Click on the down-pointing arrow to get the drop-down menu.)
So now I'll create a mount point for that partition:
sudo mkdir /storage
Next, I want to determine the UUID of my partition.***
ls -l /dev/disk/by-uuid
and I get back this output:
total 0
lrwxrwxrwx 1 root root 10 2010-04-26 12:00 20bfd80a-a96b-461c-a63d-c96ff8e95872 -> ../../sda1
lrwxrwxrwx 1 root root 10 2010-04-26 19:19 d1d0cf46-958f-4a12-a604-0ac66040648b -> ../../sda2
Then I'll edit my /etc/fstab file:
sudo cp /etc/fstab /etc/fstab_backup
sudo nano /etc/fstab
Once in there, I should add in this line:
UUID=d1d0cf46-958f-4a12-a604-0ac66040648b /storage ext4 defaults 0 0
Then I can save (Control-X), confirm (Y), and exit (Enter).
Since we've made changes to the /etc/fstab file, we need to have Ubuntu acknowledge those changes:
sudo mount -a
Now I need to give it the proper permissions. Let's just assume, for this example, that my username is jessica.
sudo chown -R jessica:jessica /storage
sudo chmod -R 755 /storage
Now the partition is mounted in the /storage folder and is ready for use!
*** Yes, I could just use the name of it (/dev/sda2), but UUID is more precise. It's unlikely that I'll unplug my internal drive, plug in a new internal drive, and then plug back in my original internal drive so that the partition names are reassigned. Still, it's safer to use the exact partition identifier in /etc/fstab.

COMMAND LINE PARTITIONING


You'll be using "fdisk" to accomplish this. Refer back to the logical name you noted from earlier. For illustration, I'll use /dev/sdb, and assume that you want a single partition on the disk, occupying all the free space.
If the number of cylinders in the disk is larger than 1024 (and large hard drives always have more), it could, in certain setups, cause problems with:
  1. software that runs at boot time (e.g., old versions of LILO)
  2. booting and partitioning software from other OSs (e.g., DOS FDISK, OS/2 FDISK)
Otherwise, this will not negatively affect you.
1) Initiate fdisk with the following command:
  •   sudo fdisk /dev/sdb 
2) Fdisk will display the following menu:
  •   Command (m for help): m 
    Command action
    a   toggle a bootable flag
    b   edit bsd disklabel
    c   toggle the dos compatibility flag
    d   delete a partition
    l   list known partition types
    m   print this menu
    n   add a new partition
    o   create a new empty DOS partition table
    p   print the partition table
    q   quit without saving changes
    s   create a new empty Sun disklabel
    t   change a partition's system id
    u   change display/entry units
    v   verify the partition table
    w   write table to disk and exit
    x   extra functionality (experts only)
    
    Command (m for help):
3) We want to add a new partition. Type "n" and press enter.
  Command action
e   extended
p   primary partition (1-4)

4) We want a primary partition. Enter "p" and enter.
  Partition number (1-4):

5) Since this will be the only partition on the drive, number 1. Enter "1" and enter.
  Command (m for help):

If it asks about the first cylinder, just type "1" and enter. (We are making 1 partition to use the whole disk, so it should start at the beginning.)
6) Now that the partition is entered, choose option "w" to write the partition table to the disk. Type "w" and enter.
  The partition table has been altered!

7) If all went well, you now have a properly partitioned hard drive that's ready to be formatted. Since this is the first partition, Linux will recognize it as /dev/sdb1, while the disk that the partition is on is still /dev/sdb.

Command Line Formatting


To format the new partition as ext3 file system (best for use under Ubuntu):
  •   sudo mkfs -t ext3 /dev/sdb1
To format the new partition as fat32 file system (best for use under Ubuntu & Windows):
  •   sudo mkfs -t fat32 /dev/sdb1
As always, substitute "/dev/sdb1" with your own partition's path.

Modify Reserved Space (Optional)


When formatting the drive as ext2/ext3, 5% of the drive's total space is reserved for the super-user (root) so that the operating system can still write to the disk even if it is full. However, for disks that only contain data, this is not necessary.
NOTE: You may run this command on a fat32 file system, but it will do nothing; therefore, I highly recommend not running it.
You can adjust the percentage of reserved space with the "tune2fs" command, like this:
 sudo tune2fs -m 1 /dev/sdb1

This example reserves 1% of space - change this number if you wish.
  • {i} Using this command does not change any existing data on the drive. You can use it on a drive which already contains data.

Create A Mount Point


Now that the drive is partitioned and formatted, you need to choose a mount point. This will be the location from which you will access the drive in the future. I would recommend using a mount point with "/media", as it is the default used by Ubuntu. For this example, we'll use the path "/media/mynewdrive"
  •   sudo mkdir /media/mynewdrive
Now we are ready to mount the drive to the mount point.

Mount The Drive


You can choose to have the drive mounted automatically each time you boot the computer, or manually only when you need to use it.

AUTOMATIC MOUNT AT BOOT


You'll need to edit /etc/fstab:
  •   gksu gedit /etc/fstab
Add this line to the end (for ext3 file system):
  •   /dev/sdb1    /media/mynewdrive   ext3    defaults     0        2
Add this line to the end (for fat32 file system):
  •   /dev/sdb1    /media/mynewdrive   vfat    defaults     0        2
    The defaults part may allow you to read, but not write. To write other partition and FAT specific options must be used. If gnome is being used, use the right-click, mount method. Then launch the mount command from terminal, no options. The last entry should be the FAT drive and and look something like:
      /dev/sda5 on /media/mynewdrive type vfat
  • (rw,nosuid,nodev,uhelper=hal,shortname=mixed,uid=1000,utf8,umask=077,flush)
  • 
    All of the parts between the parenthesis are the mount options and should replace "defaults" in the fstab file. The "2" at the end instructs your system to run a quick file system check on the hard drive at every boot. Changing it to "0" will skip this. Run 'man fstab' for more info here.
You can now run "sudo mount -a" (or reboot the computer) to have the changes take effect.
If you want to allow a normal user to create files on this drive, you can either give this user ownership of the top directory of the drive filesystem: (replace USERNAME with the username)
  •   sudo chown -R USERNAME:USERNAME /media/mynewdrive
or in a more flexible way, practical if you have several users, allow for instance the users in the plugdev group (usually those who are meant to be able to mount removable disks, desktop users) to create files and sub-directories on the disk:
  •   sudo chgrp plugdev /media/mynewdrive
    sudo chmod g+w /media/mynewdrive
    sudo chmod +t /media/mynewdrive
The last "chmod +t" adds the sticky bit, so that people can only delete their own files and sub-directories in a directory, even if they have write permissions to it (see man chmod).

MANUALLY MOUNT


Alternatively, you may want to manually mount the drive every time you need it.
For manual mounting, use the following command:
sudo mount /dev/sdb1 /media/mynewdrive 

When you are finished with the drive, you can unmount it using:
sudo umount /media/mynewdrive
That's it :)

Tuesday 27 November 2012


List of commands determine system info/resources/partitions/process in Ubuntu Linux

Following lists frequently-used commands to determine ubuntu info,resources,partitions,network,process and so on.First,open terminal fromApplications/Accessories/Terminal and type the commands.
System infomation
uname -a
#kernel/operating system/CPU info in brief.
head -n 1 /etc/issue
#see the ubuntu version,same tocat /etc/issue
hostname
#hostname
lspci -tv 
#list all PCI devices
lsusb -tv
#list all USB devices
lsmod
#list loaded kernel modes
env
#environment variable
Resources
free -m
#see the usage of memory and swap
df -h
#the usage of partitions
du -sh 
#see the size of the directory in M.
grep MemTotal /proc/meminfo
#total size of RAM
grep MemFree /proc/meminfo
#free size of RAM
uptime 
#system running time,users,load average
cat /proc/loadavg
#load average
Disk and Partition
mount | column -t
#mount info about partitions
fdisk -l
#list all partitions,need root permission
swapon -s
#list all swap partitions
hdparm -i /dev/sda
#list disk info (only for IDE)
Network
ifconfig
#list IP informations
route -n 
#list route tables
netstat -lntp
#list listening ports
netstat -antp
#list established links
Process
ps -ef
#list all processes
top
#list processes and usage of system resource
User
id username
#list the user info.
last 
#list login record
cut -d: -f1 /etc/passwd 
#list all users
cut -d: -f1 /etc/group
#list all groups
crontab -l 
#list scheduled tasks of current user
Service
chkconfig --list
#list all services
chkconfig --list | grep on
#list all running services


Edit PDF on Ubuntu with PDF Editor

PDFedit is free and open source library for manipulating PDF documents, released under terms of GNU GPL version 2. It includes PDF manipulating library based on xpdf, GUI and set of command line tools.
Multiplatform library working on Unix systems, Windows32/64 and also Windows CE and others. You can use it to read, change and extract information from a PDF file. It is based on xpdf library.Graphical interface based on QT3.x which heavily depends on scripting; therefore, any user can modify the behaviour by scripts and plugins.

Ubuntu user can easily install PDFedit by this command:
sudo apt-get install pdfedit


Check your Hardware/System infomation in Ubuntu with Hardinfo

HardInfo can gather information about your system’s hardware and operating system, perform benchmarks, and generate printable reports either in HTML or in plain text formats.
It can also be easily extended, for developer documentation and full source code (released under GNU GPL version 2) is available.
To install Hardinfo,just click:
apt:hardinfo
and launch hardinfo from Applications->System Tools->System Profiler and Benchmark


Add a User in Ubuntu

useradd
The useradd command will let you add a new user easily from the command line:
useradd 
This command adds the user, but without any extra options your user won’t have a password or a home directory.
You can use the -d option to set the home directory for the user. The -m option will force useradd to create the home directory. We’ll try creating a user account with those options, and then use the passwd command to set the password for the account. You can alternatively set a password using -p on the useradd command, but I prefer to set the password using passwd.
sudo useradd -d /home/testuser -m testuser
sudo passwd testuser
This will create the user named testuser and give them their own home directory in /home/testuser. The files in the new home directory are copied from the /etc/skel folder, which contains default home directory files. If you wanted to set default values for your users, you would do so by modifying or adding files in that directory. If we take a look at the new home directory for the user:

geek@ubuntuServ:/etc/skel$ ls -la /home/testuser
total 20
drwxr-xr-x 2 testuser testuser 4096 2006-12-15 11:34 .
drwxr-xr-x 5 root root 4096 2006-12-15 11:37 ..
-rw-r–r– 1 testuser testuser 220 2006-12-15 11:34 .bash_logout
-rw-r–r– 1 testuser testuser 414 2006-12-15 11:34 .bash_profile
-rw-r–r– 1 testuser testuser 2227 2006-12-15 11:34 .bashrc

You’ll notice that there are bash scripts in this directory. If you wanted to set default path options for all new users, you would do so by modifying the files in /etc/skel, which would then be used to create these files by the useradd command.
adduser :-
The adduser command is even easier than the useradd command, because it prompts you for each piece of information. I find it slightly funny that there are two virtually identically named commands that do the same thing, but that’s linux for you. Here’s the syntax:
adduser
Example:
geek@ubuntuServ:/etc/skel$ sudo adduser thegeek
Password:
Adding user `thegeek’…
Adding new group `thegeek’ (1004).
Adding new user `thegeek’ (1004) with group `thegeek’.
Creating home directory `/home/thegeek’.
Copying files from `/etc/skel’
Enter new UNIX password:
Retype new UNIX password:
No password supplied
Enter new UNIX password:
Retype new UNIX password:
passwd: password updated successfully
Changing the user information for thegeek
Enter the new value, or press ENTER for the default
Full Name []: The Geek
Room Number []: 0
Work Phone []: 555-1212
Home Phone []: 555-1212
Other []:
Is the information correct? [y/N] y


Recover root password under linux with single user mode

It happens sometime that you can't remember root password. On Linux, recovering root password can be done by booting Linux under a specific mode:single user mode.
This tutorial will show how to boot Linux in single user mode when using GRUB and finally how to change root password.
During normal usage, a Linux OS runs under runlevels between 2 and 5 which corresponds to various multi-user modes. Booting Linux under runlevel 1 will allow one to enter into a specific mode, single user mode. Under such a level, you directly get a root prompt. From there, changing root password is a piece of cake.

1. ENTERING RUNLEVEL 1

Some Linux distribution, such as Ubuntu for instance, offer a specific boot menu entry where it is stated "Recovery Mode" or "Single-User Mode". If this is your case, selecting this menu entry will boot your machine into single user mode, you can carry on with the next part. If not, you might want to read this part.
Using GRUB, you can manually edit the proposed menu entry at boot time. To do so, when GRUB is presenting the menu list (you might need to press ESC first), follow those instructions:
  • use the arrows to select the boot entry you want to modify.
  • press e to edit the entry
  • use the arrows to go to kernel line
  • press e to edit this entry
  • at the end of the line add the word single
  • press ESC to go back to the parent menu
  • press b to boot this kernel
The kernel should be booting as usual (except for the graphical splash screen you might be used to), and you will finally get a root prompt (sh#).
Here we are, we have gained root access to the filesystem, let's finally change the password.

2. CHANGING ROOT PASSWORD

As root, changing password does not ask for your old password, therefore running the command:
# passwd
will prompt you for your new password and will ask you to confirm it to make sure there is no typo.
That's it, you can now reboot your box and gain root access again

Tuesday 25 September 2012

How to Delete Stubborn Undeletable Files From Your PC the Easy Way [Tips, Tricks]


How to Delete Stubborn Undeletable Files From Your PC the Easy Way [Tips, Tricks]


Delete-Undeletable-files

In Windows operating systems, the administrator is considered to be the user with the most privileges. Despite having more privileges, many administrators are not able to delete their files. If you commonly use a computer as the administrator, you have likely experienced the following issues when trying to delete  files:
  • Cannot delete file: Access is denied.
  • The file is in use by another program or user.
  • The source or destination of the file may be in use.
It is irritating to not have complete access to your files when you are the administrator. Fortunately, you can get rid of these files permanently through the command prompt or by using a program like FileASSASIN.
Using the Command Prompt To Delete Files:

You won’t need third applications to remove files using the command line.
Click the “Start” button and type “CMD” or “Command Prompt” inside the search box.

Type Command Prompt

Right-click the “Command Prompt” icon from the search results and select “Run as administrator.”

CMD Admin

This will launch an elevated or administrator level Command Prompt. Doing this allows you to execute commands without restriction.

Command Prompt

An ideal command for removing a file should look like this:
DEL /F /Q /A C:\Users\Enter your username here\Enter the location of the file here\Enter the file name here
  • DEL: Stands for delete
  • /F: Stands for force delete
  • /Q: Stands for quite mode. This means that it will prompt any notifications such as “Are you sure you want to delete this file?”
  • /A: Stands for various file attributes such as read-only, hidden, ready for archiving, etc.
  • /C: Stands for your main drive. In most cases, it is the “C:” drive.
For example if you want to delete a file named “virus.exe” on the desktop, you should enter the following command:
DEL /F /Q /A C:\Users\HackersRoom\Desktop\Virus.exe
Now hit the “Enter” key to execute the command. This will permanently delete the file.
If you prefer a less geeky way to delete an undeletable file, the software below can help.

FileASSASIN:

FileASSASIN is a free program created by the developers of Malwarebytes—a well-known anti-malware program.
Double-click the executable file to run FileASSASIN.

FileASSASSIN
This is the main user interface of FileASSASIN

FileASSASSIN UI

Click the “Browse” button to find files to delete.

Browse files

After selecting a file to delete, FileASSASIN will provide you with several options. Select the“Delete” option if you want to erase the file.

FileASSASSIN Options

Now click “Execute” to completely erase the file.

Execute
That’s all you need to do to delete a file. Not a complicated process – If you are not comfortable with the Command Prompt, you can always use File Assassin to delete those stubborn files.
Download FileASSASIN

Final Thoughts:

These are useful techniques for removing persistent and harmful malware files. However, remove your files with caution.  You may end up deleting essential files if you don’t do it carefully.
................................................................................
Enjoy...(Y)
And feel free to comment...

Monday 24 September 2012

A Beginner’s Guide to Android Kernels [Tips]


A Beginner’s Guide to Android Kernels [Tips]

rooting_kernalflash_step2

Swapping out your kernel is one of the best ways to take advantage of rooting.With the right kernel, you can double your battery life or squeeze it for that extra performance. Understanding this concept is very helpful, and here’s why.


5 layers that build the                 Android stack

Alright, What’s a Kernel?

The term kernel comes from Linux, which is kind of the forerunner of Android. All Android phones come with a kernel installed on them. It is the communication link between hardware and software. One of its most important functions is Battery usage and the kernel dictates the life of your phone battery.
Your phone ships with the stock kernel. Phone manufacturers like HTC and Samsung are not exactly known for their willingness to take risks. The stock kernel put in your phone by the manufacturers is nice and safe that won’t ever break down.

HTC-logo
The stock kernel provides a constant stream of battery power to the phone. It doesn’t matter if the phone is on or off or using lots of processing power. It sends a steady and totally safe amount of battery.
However, that safety comes with a price. A phone with the stock kernel uses the same amount of power even when not in use. That’s not very efficient. Plus, what if you want to run a processing-intensive app like an N64 emulator? More processing requires more power, but the stock kernel won’t scale up the amount of battery used.

New and Improved Kernels

This is where the Android community comes in. If you’re rooted and have some sort of recovery system like ClockworkMod or Amon-Ra installed, you can flash (install) a new kernel that’s more efficient.
The advantage of custom one is that they can output variable amounts of power. Say you want to save the battery. You can undervolt the phone’s processor. Undervolting is when you tell the kernel to only provide a tiny amount of power for the phone to run.
set-cpu-android-kernel
Undervolting does make your phone lag quite a lot, but its ability to save battery is incredible. A phone modified in this way with a custom kernel can seriously go days without charging.
Alternatively, you can overclock a phone. This is when the kernel outputs large amounts of power, amounts higher than the phone usually uses. This will eat through a battery extremely quickly, but it is great for apps that would lag otherwise (like N64 emulators). Not to mention everything loads extremely quickly when a phone is overclocked.
There are a few risks to installing a new kernel. If you tell it to use an amount of battery that’s too small, there is a chance that the phone won’t be able to turn on. This is calledbootlooping, or when the phone cannot access enough power in order to start itself. However, there is a way around bootlooping, as we will discuss later.

Picking a Kernel

There are a million different options out there. That’s probably a good thing, seeing as there are about a million different phone-ROM combinations with Android. Finding a good one for your specific phone and ROM can be a bit difficult, though.
Kernel Manager Lite : It’s a free app from the Android Market that will list out a couple popular kernels for some of the more popular ROMs like CyanogenMod7 and MIUI.

miui-cyanogen-mod-7-popular-android-custom-roms
When deciding a kernel, people will throw a lot of different terms at you. You’ll see abbreviations like CFS, HAVS, and SBC. Keeping track of what everything means is a chore, so we’ll summarize.
Each abbreviation and item like overclocking and undervolting is a power mode that comes with that kernel. CFSHAVS, and BFS are all power plans that scale the amount of power used up and down, depending on how much battery your phone requests. Each plan scales differently (faster or slower), but the concept is the same.

Terms Commonly Used with Kernels:

  • Completely Fair Scheduler (CFS) is generally more consistent and stable. Stock HTC kernel uses CFS.
  • Brain F*** Scheduler (BFS) is faster and generally gives more battery life but may be a bit inconsistent.
  • Hybrid Adaptive Voltage Scaling (HAVS) manipulates the phone voltage for a better battery life. Performance usually varies for different devices.
  • Static Voltage Scaling (SVS) provides a steady voltage.
You might also see SBC. That stands for Superior Battery Charging. Most phones battery percentage drops to 90% or so right after you unplug it due to the fast rate of charging. SBC charges a battery very slowly it doesn’t lose 10% immediately. Best used for charging phones overnight.
set-cpu-power-scaling-control-management
Undervolting and underclocking are different things but basically accomplish the same thing (saving battery). Overclocking is already explained.
When looking for a kernel, ideally you want one with as many of these features as possible. It’s nice to have choices. A good kernel comes at least undervolting, overclocking, and some sort of scaling plan (like CFS/HAVS/BFS).
If you don’t find any in Kernel Manager that look good, the last resort is lots of Googling. Just search “(your phone) (your ROM) kernels” and something from XDA Developers should come up.

Installing (Flashing) The Kernel:

Once you’ve found that perfect kernel that is compatible with your phone model and ROM, you have to actually install it. Download the kernel from whatever website or Kernel Manager. It should come as a .zip file. Copy that over to your SD card.
For installing a kernel, there are two options. If you pay for Kernel Manager Pro, the app will install the kernel for you. That’s the nice and easy way.
android-kernel-manager
However, it’s not too hard to install a kernel without Kernel Manager. The other way to do it involves booting into recovery. If you don’t know how to do that on your phone, CM7’s wiki has a handy chart.
Once in recovery there are a few things that have to be done to prepare the way for the kernel. First and most importantly, make a nandroid backup of your phone. If anything goes wrong or if the phone gets stuck in an endless bootloop, this is how to fix it. Backups are very important.
There should be an option to “wipe cache.” Choose this and let it run. Next wipe the Dalvik cache. If you don’t see either of those options, look under “advanced” in ClockworkMod.
Now choose to install a .zip and choose the option to pick one from the SD card. Navigate to wherever you put the downloaded kernel. Pick the kernel and let it install. Once it’s finished, reboot your phone.

If everything went right, then you should have a new kernel. You can check by going to Settings > About phone > Software information and looking under “Kernel.” Hopefully, you’ll see the name of whatever kernel you flashed. Next step, controlling the kernel.

Apps for Kernel Management:

The kernel can work its magic now that it’s installed. However, you have to tell it to do so first. You can manually control it from the settings with certain ROMs like CyanogenMod. Everyone else will need third-party apps like SetCPU and Tasker.
SetCPU is simple and it works. Just tell it which power plan (undervolt, overclock, etc) you want to use and it does it for you. SetCPU works just fine with no glitches or anything. Just be careful how high you set the voltage.

tasker-scheduler-automatic-power-scaling
However, Tasker is most favorite app for the various purposes of controlling kernel. Tasker automates certain processes, including kernel management. The best feature here is that you can set to app to automatically undervolt your phone every time the screen is off (like when you’re not using the phone).
This small change makes a titanic difference.
Of course, the ultimate judge of battery is how often you use your phone and how rigorously that usage gets. However, automated undervolting is a fantastic way to cut down on battery drain.

Final Thoughts

Installing a new kernel can be a bit dicey, but when done correctly there’s really a minimal risk. As long as you make a nandroid backup, there’s no reason to not try flashing a new, more efficient kernel. Besides, if you’re scared of diving into recovery mode you can just get Kernel Manager Pro to do the work for you.

Related Downloads:

Start a barcode (QR code) scanner on your phone and scan the QR code below. This will take you directly to the Android market to download the app. If you do not have a QR Code scanner app, choose one from the Best QR Code Scanner Apps for Android.
android-kernel-manager-lite-download-flash-automatically-giui
Download Kernel Manager Lite
set-cpu-android-kernel-power-scaling-control-management
Download SetCPU
tasker-android-automator-scheduler-automatic-power-scaling
Download Tasker
See Also:
................................................................................
Enjoy...(Y)
And feel free to comment...